Friday, 13 December 2019

Schema refresh automation script from prod to test database


Automate two schemas refresh from prod

refresh.sh

#!/bin/sh
export ORACLE_HOME=/u01/oracle/product/12.2.0.1/dbhome_1
export PATH=$ORACLE_HOME/bin:$PATH:/usr/local/bin
export ORACLE_SID=TESTDB
datetime() { echo `date '+%a%d%b%Y %H:%M:%S'` ;}
echo =======
echo Export command
echo =======
echo $(datetime)" ORACLE_HOME="$ORACLE_HOME >> /u01/datapump/logs/progress.log
echo $(datetime)" ORACLE_SID="$ORACLE_SID >> /u01/datapump/logs/progress.log
cd /u01/datapump/refresh_backup
rm drop_objts_CEN510DM_GWR602DM.sql
#drop objects of the schemas sch1,sch2
echo $(datetime)" droping schemas sch1 and sch2 is going on " >> /u01/datapump/logs/progress.log
@/u01/datapump/scripts/drop_objts_sch1_sch2.sh $ORACLE_HOME $ORACLE_SID
#import schemas from PR with DB link
echo $(datetime)" import from PR is going on for schemas sch1 and sch2 " >> /u01/datapump/logs/progress.log
impdp \'/as sysdba\'  network_link=REFRESH directory=REFRESH_DIR logfile=impdpsch1sch2.log schemas=pdata1,pdata2 remap_schema=pdata1:sch1,pdata2:sch2 TRANSFORM=DISABLE_ARCHIVE_LOGGING:Y
egrep -q "ORA-|Linux-x86_64 Error|stopped|Failed|FATAL" /u01/datapump/prod_backup/import_data.log
if [ $? -ne 0 ]; then
 echo $(datetime)" import success"  >> /u01/datapump/logs/progress.log
else
  echo $(datetime) " import is failed, check import logfile " >> /u01/datapump/logs/Error.log
 exit 1
fi


drop_objts_sch1_sch2.sh

#!/bin/sh
export ORACLE_HOME=$1
export ORACLE_SID=$2
export PATH=$ORACLE_HOME/bin:$PATH
sqlplus /nolog 
conn / as sysdba
set pages 10000
set echo off
set head off
spool /mnt/resource/datapump/prod_backup/drop_objts_SCH1_SCH2.sql
select 'drop '||object_type||' '||owner||'.'||object_name||';' from dba_objects where owner in('SCH1','SCH2');
spool off
@/u01/datapump/refresh_backup/drop_objts_SCH1_SCH2.sql

exit;

Thursday, 5 December 2019

silent installation of 18c Grid Infrastructure for standalone server in linux

Silent installation of GI (Grid infrastructure software for standalone)- Version 18c(18.0.0)

Download the 18c GI software from oracle portal here 

File looks like: LINUX.X64_180000_grid_home.zip


Prepare a response file for 18c standalone GI install you can find the sample rsp file here


[oracle@localhost grid]$ ./gridSetup.sh -silent -ignorePrereqFailure -responseFile /opt/oracle/grid.rsp
Launching Oracle Grid Infrastructure Setup Wizard...

[FATAL] [INS-30001] The SYS password is empty.
   CAUSE: The SYS password should not be empty.
   ACTION: Provide a non-empty password.
[FATAL] [INS-30001] The ASMSNMP password is empty.
   CAUSE: The ASMSNMP password should not be empty.
   ACTION: Provide a non-empty password.
[oracle@localhost grid]$ vi /opt/oracle/grid.rsp
[oracle@localhost grid]$ ./gridSetup.sh -silent -ignorePrereqFailure -responseFile /opt/oracle/grid.rsp
Launching Oracle Grid Infrastructure Setup Wizard...

[WARNING] [INS-41812] OSDBA and OSASM are the same OS group.
   CAUSE: The chosen values for OSDBA group and the chosen value for OSASM group are the same.
   ACTION: Select an OS group that is unique for ASM administrators. The OSASM group should not be the same as the OS groups that grant privileges for Oracle ASM access, or for database administration.
[WARNING] [INS-41875] Oracle ASM Administrator (OSASM) Group specified is same as the users primary group.
   CAUSE: Operating system group oinstall specified for OSASM Group is same as the users primary group.
   ACTION: It is not recommended to have OSASM group same as primary group of user as it becomes the inventory group. Select any of the group other than the primary group to avoid misconfiguration.
[WARNING] [INS-13014] Target environment does not meet some optional requirements.
   CAUSE: Some of the optional prerequisites are not met. See logs for details. gridSetupActions2019-12-03_04-52-40PM.log
   ACTION: Identify the list of failed prerequisite checks from the log: gridSetupActions2019-12-03_04-52-40PM.log. Then either from the log file or from installation manual find the appropriate configuration to meet the prerequisites and fix it manually.
The response file for this session can be found at:
 /opt/oracle/product/18.0.0/grid/install/response/grid_2019-12-03_04-52-40PM.rsp

You can find the log of this install session at:
 /tmp/GridSetupActions2019-12-03_04-52-40PM/gridSetupActions2019-12-03_04-52-40PM.log

As a root user, execute the following script(s):
        1. /opt/oracle/oraInventory/orainstRoot.sh
        2. /opt/oracle/product/18.0.0/grid/root.sh

Execute /opt/oracle/product/18.0.0/grid/root.sh on the following nodes:
[localhost]


Successfully Setup Software with warning(s).
As install user, execute the following command to complete the configuration.
        /opt/oracle/product/18.0.0/grid/gridSetup.sh -executeConfigTools -responseFile /opt/oracle/grid.rsp [-silent]


Moved the install session logs to:
 /opt/oracle/oraInventory/logs/GridSetupActions2019-12-03_04-52-40PM
[oracle@localhost grid]$ su -
Password:
Last login: Tue Dec  3 16:50:44 IST 2019 on pts/0
[root@localhost ~]# /opt/oracle/oraInventory/orainstRoot.sh
Changing permissions of /opt/oracle/oraInventory.
Adding read,write permissions for group.
Removing read,write,execute permissions for world.

Changing groupname of /opt/oracle/oraInventory to oinstall.
The execution of the script is complete.
[root@localhost ~]# /opt/oracle/product/18.0.0/grid/root.sh
Check /opt/oracle/product/18.0.0/grid/install/root_localhost.localdomain_2019-12-03_16-54-22-182633796.log for the output of root script
[root@localhost ~]# cat /opt/oracle/product/18.0.0/grid/install/root_localhost.localdomain_2019-12-03_16-54-22-182633796.log
Performing root user operation.

The following environment variables are set as:
    ORACLE_OWNER= oracle
    ORACLE_HOME=  /opt/oracle/product/18.0.0/grid
   Copying dbhome to /usr/local/bin ...
   Copying oraenv to /usr/local/bin ...
   Copying coraenv to /usr/local/bin ...


Creating /etc/oratab file...
Entries will be added to the /etc/oratab file as needed by
Database Configuration Assistant when a database is created
Finished running generic part of root script.
Now product-specific root actions will be performed.
Using configuration parameter file: /opt/oracle/product/18.0.0/grid/crs/install/crsconfig_params
The log of current session can be found at:
  /opt/oracle/oracle_base/crsdata/localhost/crsconfig/roothas_2019-12-03_04-54-22PM.log
2019/12/03 16:54:24 CLSRSC-363: User ignored prerequisites during installation
LOCAL ADD MODE
Creating OCR keys for user 'oracle', privgrp 'oinstall'..
Operation successful.
LOCAL ONLY MODE
Successfully accumulated necessary OCR keys.
Creating OCR keys for user 'root', privgrp 'root'..
Operation successful.
CRS-4664: Node localhost successfully pinned.
2019/12/03 16:54:48 CLSRSC-330: Adding Clusterware entries to file 'oracle-ohasd.service'
CRS-2791: Starting shutdown of Oracle High Availability Services-managed resources on 'localhost'
CRS-2673: Attempting to stop 'ora.evmd' on 'localhost'
CRS-2677: Stop of 'ora.evmd' on 'localhost' succeeded
CRS-2793: Shutdown of Oracle High Availability Services-managed resources on 'localhost' has completed
CRS-4133: Oracle High Availability Services has been stopped.
CRS-4123: Oracle High Availability Services has been started.

localhost     2019/12/03 16:56:05     /opt/oracle/product/18.0.0/grid/cdata/localhost/backup_20191203_165605.olr     70732493
2019/12/03 16:56:11 CLSRSC-327: Successfully configured Oracle Restart for a standalone server
[root@localhost ~]# exit
logout
[oracle@localhost grid]$ /opt/oracle/product/18.0.0/grid/gridSetup.sh -executeConfigTools -responseFile /opt/oracle/grid.rsp -silent
Launching Oracle Grid Infrastructure Setup Wizard...

You can find the logs of this session at:
/opt/oracle/oraInventory/logs/GridSetupActions2019-12-03_04-56-54PM

Successfully Configured Software.
[oracle@localhost grid]$ ps -ef|grep smon
oracle   19218     1  0 16:58 ?        00:00:00 asm_smon_+ASM
oracle   19607  2951  0 16:58 pts/0    00:00:00 grep --color=auto smon


Monday, 16 September 2019

oracle database 19c(193000) installation on linux in silent mode


To download 19c software for linux click here and download zip file as below.


Create ORACLE_HOME directory. example: /u01/app/oracle/product/1930/dbhome_1

In 19c we have to unzip software to ORACLE_HOME directory.

[oracle@localhost ]$ unzip LINUX.X64_193000_db_home.zip -d /u01/app/oracle/product/1930/dbhome_1/

prepare response file /u01/app/oracle/product/1930/dbhome_1/install/response/db_install.rsp  as below.

#-------------------------------------------------------------------------------
oracle.install.option=INSTALL_DB_SWONLY

#-------------------------------------------------------------------------------
# Specify the Unix group to be set for the inventory directory.
#-------------------------------------------------------------------------------
UNIX_GROUP_NAME=oinstall

#-------------------------------------------------------------------------------
# Specify the location which holds the inventory files.
# This is an optional parameter if installing on
# Windows based Operating System.
#-------------------------------------------------------------------------------
INVENTORY_LOCATION=/u01/app/oracle/product/1930/oraInventory
#-------------------------------------------------------------------------------
# Specify the complete path of the Oracle Home.
#-------------------------------------------------------------------------------
ORACLE_HOME=/u01/app/oracle/product/1930/dbhome_1

#-------------------------------------------------------------------------------
# Specify the complete path of the Oracle Base.
#-------------------------------------------------------------------------------
ORACLE_BASE=/u01/app/oracle/product/1930

#-------------------------------------------------------------------------------
# Specify the installation edition of the component.
#
# The value should contain only one of these choices.
#   - EE     : Enterprise Edition
#   - SE2     : Standard Edition 2


#-------------------------------------------------------------------------------

oracle.install.db.InstallEdition=EE
###############################################################################
#                                                                             #
# PRIVILEGED OPERATING SYSTEM GROUPS                                          #
# ------------------------------------------                                  #
# Provide values for the OS groups to which SYSDBA and SYSOPER privileges     #
# needs to be granted. If the install is being performed as a member of the   #
# group "dba", then that will be used unless specified otherwise below.       #
#                                                                             #
# The value to be specified for OSDBA and OSOPER group is only for UNIX based #
# Operating System.                                                           #
#                                                                             #
###############################################################################

#------------------------------------------------------------------------------
# The OSDBA_GROUP is the OS group which is to be granted SYSDBA privileges.
#-------------------------------------------------------------------------------
oracle.install.db.OSDBA_GROUP=oinstall

#------------------------------------------------------------------------------
# The OSOPER_GROUP is the OS group which is to be granted SYSOPER privileges.
# The value to be specified for OSOPER group is optional.
#------------------------------------------------------------------------------
oracle.install.db.OSOPER_GROUP=oinstall

#------------------------------------------------------------------------------
# The OSBACKUPDBA_GROUP is the OS group which is to be granted SYSBACKUP privileges.
#------------------------------------------------------------------------------
oracle.install.db.OSBACKUPDBA_GROUP=oinstall

#------------------------------------------------------------------------------
# The OSDGDBA_GROUP is the OS group which is to be granted SYSDG privileges.
#------------------------------------------------------------------------------
oracle.install.db.OSDGDBA_GROUP=oinstall

#------------------------------------------------------------------------------
# The OSKMDBA_GROUP is the OS group which is to be granted SYSKM privileges.
#------------------------------------------------------------------------------
oracle.install.db.OSKMDBA_GROUP=oinstall

#------------------------------------------------------------------------------
# The OSRACDBA_GROUP is the OS group which is to be granted SYSRAC privileges.
#------------------------------------------------------------------------------

oracle.install.db.OSRACDBA_GROUP=oinstall

===========================================
Run install in silent mode:

[oracle@localhost dbhome_1]$ ./runInstaller -ignorePrereq -silent -responseFile /u01/app/oracle/product/1930/dbhome_1/install/response/db_install.rsp
Launching Oracle Database Setup Wizard...

[WARNING] [INS-13013] Target environment does not meet some mandatory requirements.
   CAUSE: Some of the mandatory prerequisites are not met. See logs for details. /u01/app/oraInventory/logs/InstallActions2019-09-17_08-00-10AM/installActions2019-09-17_08-00-10AM.log
   ACTION: Identify the list of failed prerequisite checks from the log: /u01/app/oraInventory/logs/InstallActions2019-09-17_08-00-10AM/installActions2019-09-17_08-00-10AM.log. Then either from the log file or from installation manual find the appropriate configuration to meet the prerequisites and fix it manually.
The response file for this session can be found at:
 /u01/app/oracle/product/1930/dbhome_1/install/response/db_2019-09-17_08-00-10AM.rsp

You can find the log of this install session at:
 /u01/app/oraInventory/logs/InstallActions2019-09-17_08-00-10AM/installActions2019-09-17_08-00-10AM.log


As a root user, execute the following script(s):
        1. /u01/app/oracle/product/1930/dbhome_1/root.sh

Execute /u01/app/oracle/product/1930/dbhome_1/root.sh on the following nodes:
[localhost]


Successfully Setup Software with warning(s).

[oracle@localhost dbhome_1]$ sqlplus -v

SQL*Plus: Release 19.0.0.0.0 - Production
Version 19.3.0.0.0

Saturday, 16 February 2019

Resolve archivelog gap using service

Resolve archivelog gap using service(12c new feature)
In standby side:
rman target /
RMAN>recover database from service <primary service name> noredo using compressed backupset;
RMAN>shutdown immediate
RMAN>startup nomount
RMAN>RESTORE STANDBY CONTROLFILE FROM SERVICE <primary service name>;
RMAN>alter database mount;
Start mrp using below command.
sql>alter database recover managed standby database disconnect from session;

Sunday, 23 December 2018

goldengate 12.3 installation silent mode

1. Download file below.
123014_fbo_ggs_Linux_x64_shiphome.zip

2. After unzip, you will get the file fbo_ggs_Linux_x64_shiphome

3. create response file.
[oracle@localhost opt]$ cd /opt/fbo_ggs_Linux_x64_shiphome/Disk1/response

vi oggcore.rsp

INSTALL_OPTION=ORA12C
SOFTWARE_LOCATION=/u01/app/oracle/products
START_MANAGER=NO
DATABASE_LOCATION=/u01/app/oracle/product/12.2.0/dbhome_1
INVENTORY_LOCATION=/u01/app/oraInventory
UNIX_GROUP_NAME=oinstall

4. Install in silent mode.
[oracle@localhost Disk1]$ ./runInstaller -silent -nowait -responseFile /opt/fbo_ggs_Linux_x64_shiphome/Disk1/response/oggcore.rsp
Starting Oracle Universal Installer...

Checking Temp space: must be greater than 120 MB.   Actual 13755 MB    Passed
Checking swap space: must be greater than 150 MB.   Actual 1658 MB    Passed
Preparing to launch Oracle Universal Installer from /tmp/OraInstall2018-12-23_03-37-06AM. Please wait ...[oracle@localhost Disk1]$ You can find the log of this install session at:
 /u01/app/oraInventory/logs/installActions2018-12-23_03-37-06AM.log
The installation of Oracle GoldenGate Core was successful.
Please check '/u01/app/oraInventory/logs/silentInstall2018-12-23_03-37-06AM.log' for more details.
Successfully Setup Software.

5. if you get any link issue, follow below.
[oracle@localhost gg123]$ ./ggsci
./ggsci: error while loading shared libraries: libnnz12.so: cannot open shared object file: No such file or directory

[oracle@localhost lib]$ cd /u01/app/oracle/product/12.2.0/dbhome_1/lib
[oracle@localhost lib]$ ls -lrt libnnz12*
-rw-r--r--. 1 oracle oinstall 1928046 Nov 21  2016 libnnz12.a
-rw-r--r--. 1 oracle oinstall 6568149 Nov 21  2016 libnnz12.so
[oracle@localhost lib]$ cd /u01/app/oracle/product/gg123
[oracle@localhost gg123]$ ln -s /u01/app/oracle/product/12.2.0/dbhome_1/lib/libnnz12.so .
---------------------------------------------------------------
we may get link issue for below libs, perform below command.
---------------------------------------------------------------
[oracle@localhost lib]$ cd /u01/app/oracle/product/gg123
ln -s /u01/app/oracle/product/12.2.0/dbhome_1/lib/libnnz12.so .
ln -s /u01/app/oracle/product/12.2.0/dbhome_1/lib/libclntsh.so.12.1 .
ln -s /u01/app/oracle/product/12.2.0/dbhome_1/lib/libons.so .
ln -s /u01/app/oracle/product/12.2.0/dbhome_1/lib/libclntshcore.so.12.1 .

Wednesday, 10 October 2018

Cloning oracle home to new home.

Cloning oracle home to new home.

In this example we have taken already installed oracle home db_1 to create another home in the same server db_2.

Source home: /u01/app/oracle/product/12.1.0/db_1
Clone home: /u01/app/oracle/product/12.1.0/db_2

Use cp command to copy source home to new clone home as below.

[oracle@oratest ~]$ echo $ORACLE_HOME
/u01/app/oracle/product/12.1.0/db_1

[oracle@oratest ~]$ cd /u01/app/oracle/product/12.1.0
[oracle@orahost 11.2.0]$ cp -rp db_1 db_2
cp: cannot open `db_1/bin/nmhs' for reading: Permission denied
cp: cannot open `db_1/bin/nmb' for reading: Permission denied
cp: cannot open `db_1/bin/nmo' for reading: Permission denied


use the runInstaller command in the new Oracle Home as below:

[oracle@oratest 12.1.0]$ cd db_2/oui/bin
[oracle@oratest bin]$ ./runInstaller -silent -clone ORACLE_BASE="/u01/app/oracle" ORACLE_HOME="/u01/app/oracle/product/12.1.0/db_2" ORACLE_HOME_NAME="OraHome2"

Starting Oracle Universal Installer...

Checking swap space: must be greater than 500 MB.   Actual 3960 MB    Passed
Preparing to launch Oracle Universal Installer from /tmp/OraInstall2018-03-12_09-46-15AM. Please wait ...[oracle@orahost bin]$ Oracle Universal Installer, Version 12.1.0.1.0 Production
Copyright (C) 1999, 2015, Oracle. All rights reserved.

You can find the log of this install session at:
 /u01/app/oraInventory/logs/cloneActions2018-03-12_09-46-15AM.log
.................................................................................................... 100% Done.


Installation in progress (Tuesday, March 12, 2018 9:46:35 AM EDT)
.............................................................................                                                   77% Done.
Install successful

Linking in progress (Tuesday, March 12, 2018 9:46:43 AM EDT)
Link successful

Setup in progress (Tuesday, March 12, 2018 9:48:14 AM EDT)
Setup successful

End of install phases.(Tuesday, March 12, 2018 9:50:31 AM EDT)
WARNING:
The following configuration scripts need to be executed as the "root" user.
/u01/app/oracle/product/12.1.0/db_2/root.sh
To execute the configuration scripts:
    1. Open a terminal window
    2. Log in as "root"
    3. Run the scripts
    
The cloning of OraHome2 was successful.
Please check '/u01/app/oraInventory/logs/cloneActions2018-03-12_09-46-15AM.log' for more details.


We are ready with new home db_2

Saturday, 1 September 2018

Restore latest control file from primary database to standby database in oracle

You may need to restore latest controlfile from primary database for any reason  like controlfile data corruption or missing. you find the below steps to follow restore.

--In RMAN, connect to the PRIMARY database and create a standby control file backup:

RMAN> BACKUP CURRENT CONTROLFILE FOR STANDBY FORMAT '/tmp/stdbycontrolfile.ctl';

--Copy the standby control file backup to the STANDBY system(in this example /tmp/stdbycontrolfile.ctl)

--Capture datafile information in STANDBY database.

spool datafile_names.txt
set lines 200
col name format a60
select file#, name from v$datafile order by file# ;
spool off

--From RMAN, connect to STANDBY database and restore the standby control file:

RMAN> SHUTDOWN IMMEDIATE ;
RMAN> STARTUP NOMOUNT;
RMAN> RESTORE STANDBY CONTROLFILE FROM '/tmp/stdbycontrolfile.ctl';

--Shut down the STANDBY database and startup mount:

RMAN> SHUTDOWN IMMEDIATE ;
RMAN> STARTUP MOUNT


--Catalog datafiles and archivelog files in STANDBY if location/name of datafiles is different.

RMAN> CATALOG START WITH '<datafiles_location>';
RMAN> CATALOG START WITH '<arch files location>';


--Start mrp as below.

ALTER DATABASE RECOVER MANAGED STANDBY DATABASE DISCONNECT;

Wednesday, 22 August 2018

oracle goldengate interview questions

1. what is suplimental logging and why its required for gg replication.
2. what is tranlog in goldengate level.
3. what is PASSTHROU parameter
4. what is ASSUMETARGETDEFS parameter
5. what is credential store
6. what is checkpoint table? which capture mode it will be used integrated/classic?
7. what is discard file. what data it will stores.
8. what si BATCHSQL mode.
9. difference between Lag at checkpoit and Time since checkpoint.
10. what is CDR.
11 difference between classic and integrated capture.
12. what all manager process can do.

Sunday, 12 August 2018

password file auto resync in oracle standby in oracle 12cr2

Every time you change password for password file users like sys, system, sysdg..... in primary database, you need to copy password file to standby site every time. 

In oracle 12cr2 DBAs will have relief, any changes for the password file in database level like change password, adding new user to password file etc will automatically resync in all standby site.

This is possible as password file changes also becomes as redo.

Below the demonstration: In this demo, primary and standby are in same server with same ORACLE_HOME.

primary: orcl
standby: stdby

password files timestamp before creating new user.
[oracle@localhost dbs]$ pwd
/u01/app/oracle/product/12.2.0/dbhome_1/dbs
[oracle@localhost dbs]$ ls -lrt orapw*
-rw-r-----. 1 oracle oinstall 4.5K Aug 12 15:10 orapworcl
-rw-r-----. 1 oracle oinstall 3.5K Aug 12 15:11 orapwstdby
[oracle@localhost dbs]$ sqlplus / as sysdba

SQL*Plus: Release 12.2.0.1.0 Production on Sun Aug 12 15:26:49 2018

Copyright (c) 1982, 2016, Oracle.  All rights reserved.


Connected to:
Oracle Database 12c Enterprise Edition Release 12.2.0.1.0 - 64bit Production

SQL> grant connect,sysdba to dba_user identified by dba_user;

Grant succeeded.

SQL> exit
Disconnected from Oracle Database 12c Enterprise Edition Release 12.2.0.1.0 - 64bit Production
password files timestamp after creating new user. orcl password file showing new timestamp
[oracle@localhost dbs]$ ls -lrt orapw*
-rw-r-----. 1 oracle oinstall 3.5K Aug 12 15:11 orapwstdby
-rw-r-----. 1 oracle oinstall 5.0K Aug 12 15:27 orapworcl

switch logfile in primary:
[oracle@localhost dbs]$ sqlplus / as sysdba

SQL*Plus: Release 12.2.0.1.0 Production on Sun Aug 12 15:27:27 2018

Copyright (c) 1982, 2016, Oracle.  All rights reserved.


Connected to:
Oracle Database 12c Enterprise Edition Release 12.2.0.1.0 - 64bit Production

SQL> alter system switch logfile;

System altered.

SQL> exit
Disconnected from Oracle Database 12c Enterprise Edition Release 12.2.0.1.0 - 64bit Production

password files timestamp after switch logfile. now standby password file also showing new timestamp, so its updated.
[oracle@localhost dbs]$ ls -lrt orapw*
-rw-r-----. 1 oracle oinstall 5.0K Aug 12 15:27 orapworcl
-rw-r-----. 1 oracle oinstall 4.0K Aug 12 15:27 orapwstdby

user is updated in standby database.
[oracle@localhost dbs]$ . oraenv
ORACLE_SID = [orcl] ? stdby
The Oracle base remains unchanged with value /u01/app/oracle
[oracle@localhost dbs]$ sqlplus / as sysdba

SQL*Plus: Release 12.2.0.1.0 Production on Sun Aug 12 15:38:17 2018

Copyright (c) 1982, 2016, Oracle.  All rights reserved.


Connected to:
Oracle Database 12c Enterprise Edition Release 12.2.0.1.0 - 64bit Production

SQL> select username,sysdba from v$pwfile_users where username='TEST_USER';


USERNAME             SYSDB
-------------------- -----
TEST_USER            TRUE


EXPDP in readonly standby in oracle

Expdp is not possible while standby database is in "read only with apply"

Reason: every datapump job will create master table in database to track the job status. So the database is in readonly it cannot create master table in database and throw error.

[oracle@localhost app]$ expdp \'/as sysdba\' directory=dump dumpfile=test.dmp logfile=test.log tables=ramesh.test

Export: Release 12.2.0.1.0 - Production on Sun Aug 12 13:12:01 2018

Copyright (c) 1982, 2017, Oracle and/or its affiliates.  All rights reserved.

Connected to: Oracle Database 12c Enterprise Edition Release 12.2.0.1.0 - 64bit Production
ORA-31626: job does not exist
ORA-31633: unable to create master table "SYS.SYS_EXPORT_TABLE_05"
ORA-06512: at "SYS.DBMS_SYS_ERROR", line 95
ORA-06512: at "SYS.KUPV$FT", line 1161
ORA-16000: database or pluggable database open for read-only access
ORA-06512: at "SYS.KUPV$FT", line 1054
ORA-06512: at "SYS.KUPV$FT", line 1042

Saturday, 23 June 2018

How to trim crfclust.bdb file..

How to trim crfclust.bdb file.
------------------------------------------------------

Location:  <grid_home>/crf/db/<nodename>

$ls -lrt crfclust.bdb

As grid user:

$oclumon manage -repos resize 259200
node01 --> retention check successful
node02 --> retention check successful
New retention is 259200 and will use 4516300800 bytes of disk space

CRS-9115-Cluster Health Monitor repository size change completed on all nodes.

$oclumon manage -get repsize

CRS-9011-Error manage: Failed to initialize connection to the Cluster Logger Service

$ crsctl stop res ora.crf -init
CRS-2673: Attempting to stop 'ora.crf' on 'node01'
CRS-2677: Stop of 'ora.crf' on 'node01' succeeded
$ crsctl start res ora.crf -init 

$ crsctl stop res ora.crf -init
CRS-2673: Attempting to stop 'ora.crf' on 'node02'
CRS-2677: Stop of 'ora.crf' on 'node02' succeeded
$ crsctl start res ora.crf -init


Now file would be trimmed.

$ls -lrt crfclust.bdb


Saturday, 2 June 2018

Exadata regular commands

To find exadata machine version.
 In database server:
$cat /opt/oracle.SupportTools/onecommand/databasemachine.xml|grep -i MACHINETYPE

Exadata storage cell server software version:

#imageinfo


cellcli> list physicaldisk;

How to find Archivelog gap in oracle standby

To find Archivelog gap in standby 


I am mentioning 2 ways to find gap:

1.
simplest way to find archivelog gap is using below single commands from primary database itself.
you can use anyone of the below queries as per your wish.

Query 1:

set lines 200
col DESTINATION for a30
col ERROR for a50
select DESTINATION,TYPE,ARCHIVED_THREAD#,APPLIED_SEQ#,ARCHIVED_SEQ#,GAP_STATUS,error from v$archive_dest_status where DEST_ID=2;

Sample output:

DESTINATION                    TYPE             ARCHIVED_THREAD# APPLIED_SEQ# ARCHIVED_SEQ# GAP_STATUS               ERROR
------------------------------ ---------------- ---------------- ------------ ------------- ------------------------ --------------------------------------------------
ORCL                           PHYSICAL                        1        29711         29712 NO GAP


Query 2:
select(select name from v$database) name,
(select max(sequence#) from v$archived_log where dest_id=1
) current_primary_seq,
(select max(sequence#)
from v$archived_log
where trunc(next_time)> sysdate-1
and dest_id=2
) max_stby,
(select nvl(
(select max(sequence#)-min(sequence#)
from v$archived_log
where trunc(next_time)> sysdate-1
and dest_id=2
and applied='NO'
),0)
from dual
) "To be Applied",
((select max(sequence#) from v$archived_log where dest_id=1)-
(select max(sequence#) from v$archived_log where dest_id=2)) "To be shipped"
from dual;

Sample output:

NAME      CURRENT_PRIMARY_SEQ   MAX_STBY To be Applied To be shipped
--------- ------------------- ---------- ------------- -------------
ORCL                    29713      29713             0             0


2:
In Primary:

To find database status and max log sequence for each thread.
select name,database_role,open_mode from v$database;
select thread#,max(sequence#) from gv$archived_log group by thread#;

To find if there is any error for the standby apply, here ERROR colomun should be null value.
set lines 200
col dest_name for a40
col destination for a30
select dest_id,dest_name,target,destination,status,error from v$archive_dest where dest_id=2;


In Syandby side:

To find database status;
select name,database_role,open_mode from v$database;

To find the received sequence and applied sequence.

SELECT ARCH.THREAD# "Thread", ARCH.SEQUENCE# "Last Sequence Received", APPL.SEQUENCE# "Last Sequence Applied", (ARCH.SEQUENCE# - APPL.SEQUENCE#) "Difference"
          FROM
         (SELECT THREAD# ,SEQUENCE# FROM V$ARCHIVED_LOG WHERE (THREAD#,FIRST_TIME ) IN (SELECT THREAD#,MAX(FIRST_TIME) FROM V$ARCHIVED_LOG GROUP BY THREAD#)) ARCH,
         (SELECT THREAD# ,SEQUENCE# FROM V$LOG_HISTORY WHERE (THREAD#,FIRST_TIME ) IN (SELECT THREAD#,MAX(FIRST_TIME) FROM V$LOG_HISTORY GROUP BY THREAD#)) APPL
         WHERE
         ARCH.THREAD# = APPL.THREAD#
          ORDER BY 1;

Remember, difference value is 0 it does not mean that standby is in sync.
Received sequence and max sequence in primary(which is taken above) should be same to confirm archives are reaching to standby from primary. if the received sequence in above query is less than max sequence in primary then there is gap in receiving archives from primary, need to find the reason according to error in alert log in primary.
If there is difference between received seq and applied seq , Then there is apply gap in standby, then we need to check standby is in recovery more or any other issue in standby based on alert log in standby.

To Check MRP is running in database level.

select process,status from v$managed_standby;

Hope it will help


Sunday, 31 December 2017

oracle GoldenGate Microservices Architecture 12.3

oracle GoldenGate Microservices Architecture 12.3 

Download goldengate software for microservices file (Oracle GoldenGate 12.3.0.1.2 Microservices for Oracle on Linux x86-64 (443 MB))  in the link 


Database Preparation:

SQL> create user oggadminuser identified by oracle;

User created.

SQL> grant connect,resource to oggadminuser;

Grant succeeded.

SQL> exec dbms_goldengate_auth.grant_admin_privilege('OGGADMINUSER');


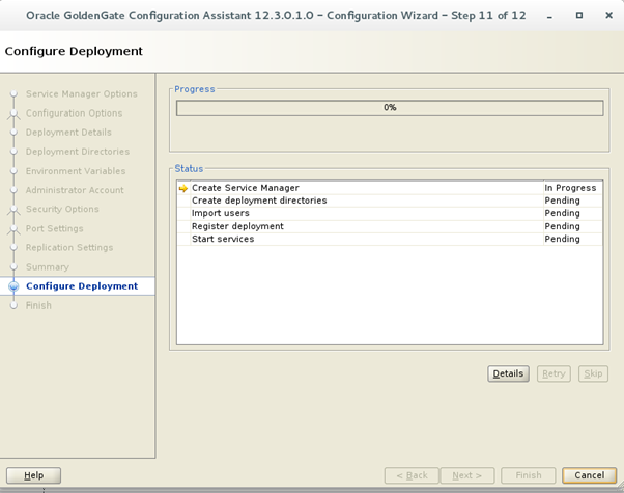
PL/SQL procedure successfully completed.